
This week's Frugal Homemade feature is an easy and affordable DIY chair makeover that you can do all by yourself in a single afternoon! After finding a cute-but-boring chair at a garage sale for just $5.00, I knew it was coming home with me. I'd been on the lookout for a nice little chair I could put in my bedroom to bring out when we had company and needed extra seating. With a little paint and some updated fabric, this now fits the bill.
Supplies
What you'll need:
- Wooden chair
- Paint (I used Folk Art Home Decor chalk paint in "Castle" from JoAnn)
- Paint brush (I used a 2" angle brush, but really any small brush you have handy should work)
- Upholstery foam, 1" thick (if your chair isn't padded enough)
- Fabric (approximately ½ yard, depending on the size of your chair)
- Staple gun
Instructions
Let's get started!

Step 1: Remove the seat of your chair by flipping it over and removing the screws from each corner. Next you'll want to make sure your chair is clean enough to paint, so wipe it down well.
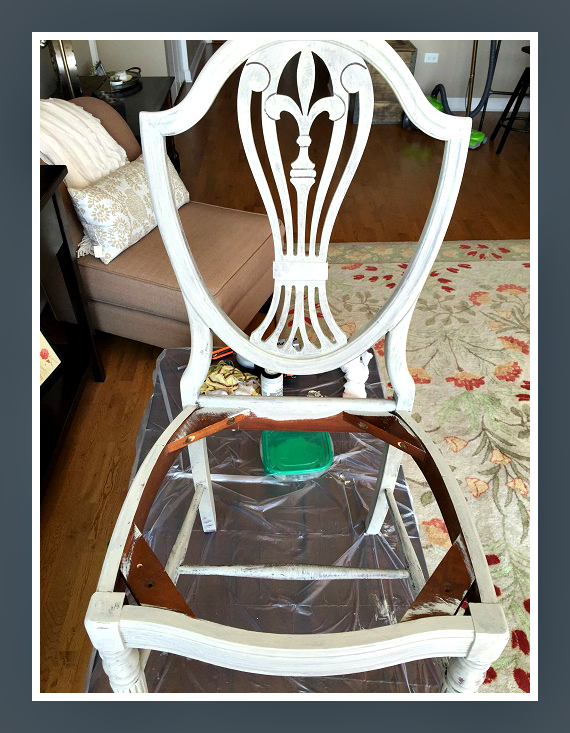
Now you're ready to paint your chair. Depending on the type of paint you use and the details on the chair, it might take two or three coats to completely cover the wood.
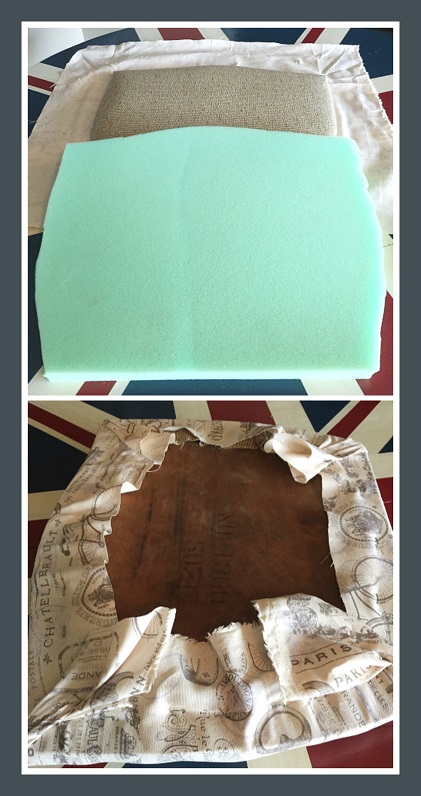
While the paint is drying, you can re-cover the seat. (There is no need to remove the original fabric and padding, unless it is a bold pattern you can see through your new fabric.)
- If you are adding foam or replacing the old padding, just lay the seat on top of the new foam and trace the outline, then cut out the foam to fit your seat.
Lay the foam and the seat on top of your fabric. Cut your fabric, being sure to leave enough room to wrap it all the way around the edges and over the bottom of the seat, leaving about 3-4 inches extra on each side. If your fabric has a pattern, make sure that it is facing the right way when you flip the seat over. (If not, the staples are easy to remove with a standard screwdriver. I know this to be true! 😉 )
Now use your staple gun to secure the fabric to the seat, being sure to pull it taut so that it holds everything in place. When the paint is dry, re-attach the seat to the frame using the same screws you removed in step 1.
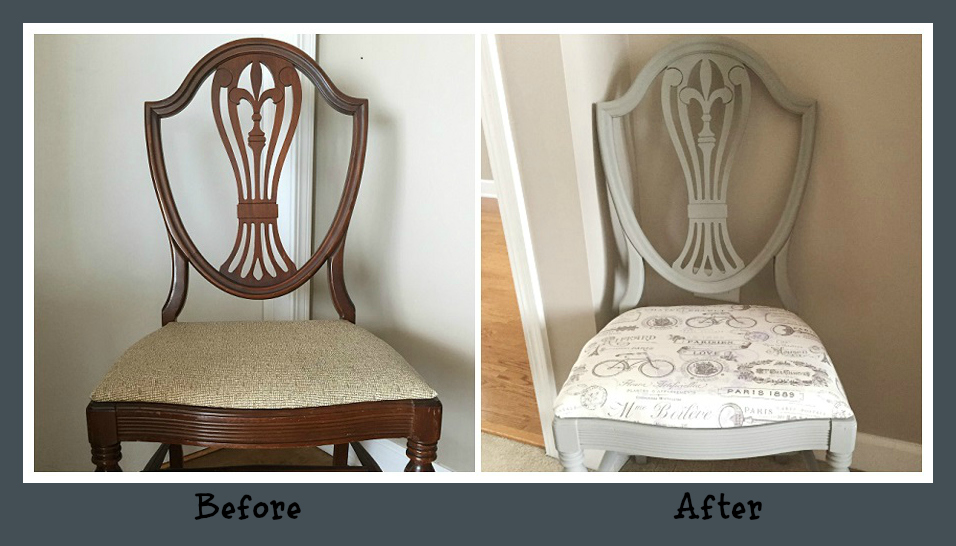
That's it! Wasn't that easy? And now you have a cute little chair -- Who doesn't need an extra chair at times? Now just take a seat in your new chair and relax for a bit, because this took less than three hours from start to finish!
christine
Monday 13th of July 2015
Adorable! Great project to do this summer. I am planning on recovering my dining room chairs this summer. You inspired me to get it done!
Wende
Tuesday 7th of July 2015
You're chair looks great, Allison! Did you also get the fabric at JoAnn's? I have a Goodwill chair in my garage right now that I am planning on "redecorating". Keep those projects coming!!!
Diane
Friday 3rd of July 2015
I love projects too. We picked up an old chair at a church rummage sale a few years back. It had a cushion on it that needed cording in it - uhhh what to do? My sister in law came to visit & she has taken many many sewing classes so she helped us out with it. Then we needed a zipper which I had also picked up at a church sale & she put the zipper in it too - Turned out darn nice! One of a kind for sure.
Jaci
Friday 3rd of July 2015
Love it! I love projects like these so cute and affordable.
Sue
Friday 3rd of July 2015
Nice! Thanks, Allison, as you really made it look doable.