Note from Rachel: Welcome back to Allison, who brings us this (CUTE) Frugal Homemade guest post today! 😉
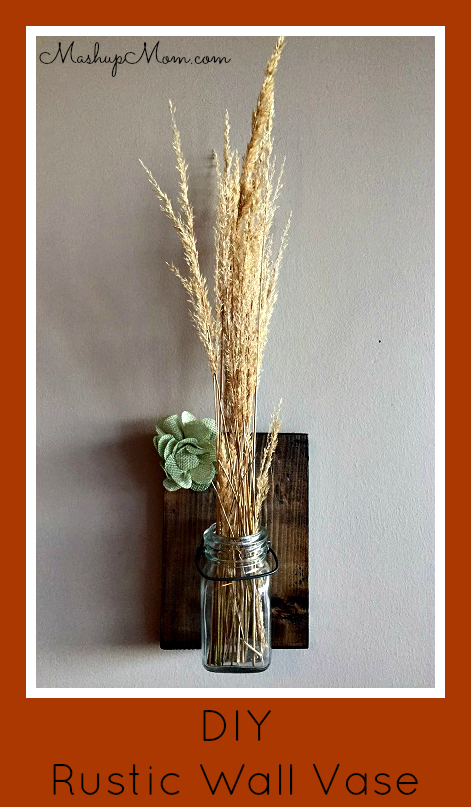
This week's Frugal Homemade features easy DIY rustic wall vases, which are perfect for updating your fall decor. I have been admiring wall vases similar to these on Etsy so thought I would give it a try myself -- and this ended up being a very quick project that turned out great!
Easy DIY Rustic Wall Vases
Materials You'll Need for this Easy DIY Project
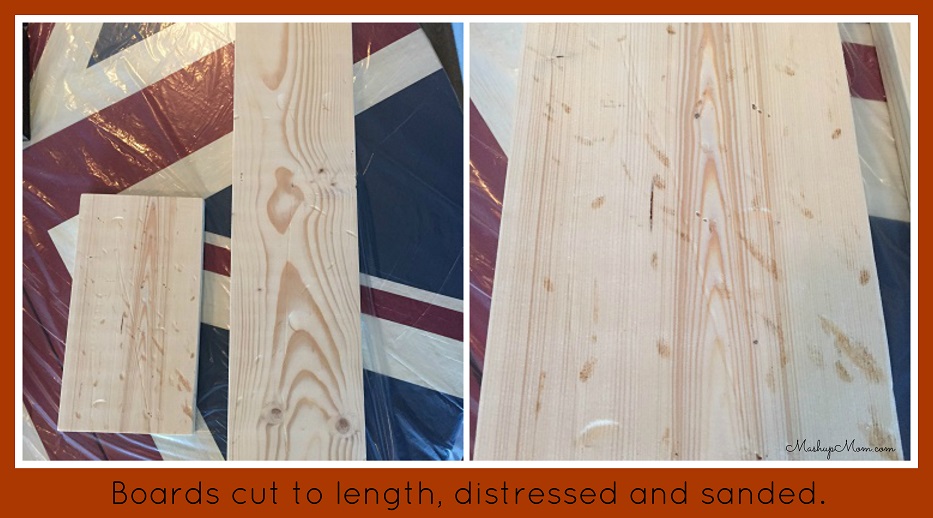
- Wood (I used 1" x 6" x 8' boards that were about $8.00 at Home Depot. This made two 24" lengths and seven 10" lengths. You can cut them to whatever length you'd like; I wanted some extras to use for gifts.)
- Sandpaper
- Stain (and rubber gloves and a rag) or paint
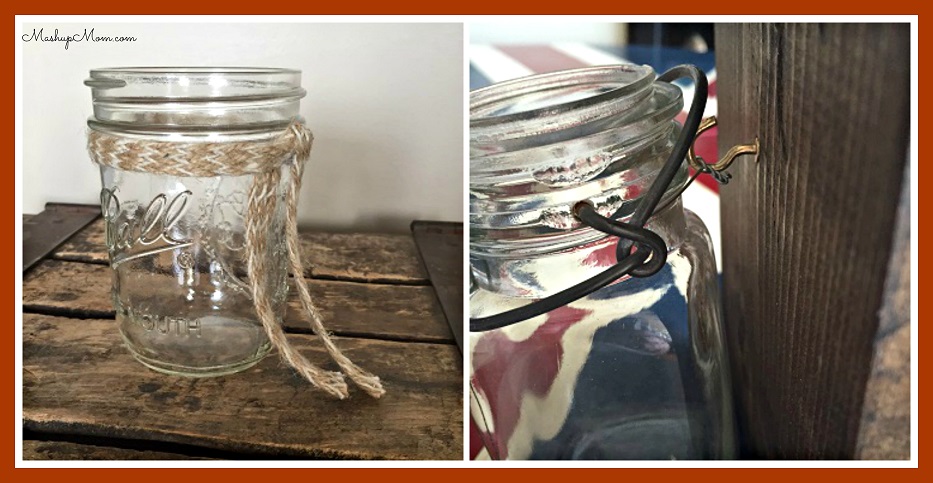
- Jars -- mason, decorative, etc.
- Twine, burlap, wire or ribbon
- Flowers, candles, or "collectibles" like seashells or beach glass -- or even seasonal treasures, like acorns and small pine cones
- Sawtooth picture hangers
- Cup holder hooks
- Glue gun
- Optional embellishments
Step-by-Step Easy DIY Rustic Wall Vases
Let's get started!
Step one
First, I cut my wood to the lengths I wanted using a miter saw. (If you don't have a miter saw, circular saw, or jigsaw, ask The Guy at Home Depot to cut it for you. They aren't technically supposed to cut smaller lengths, but they have always been willing to cut wood for me.)
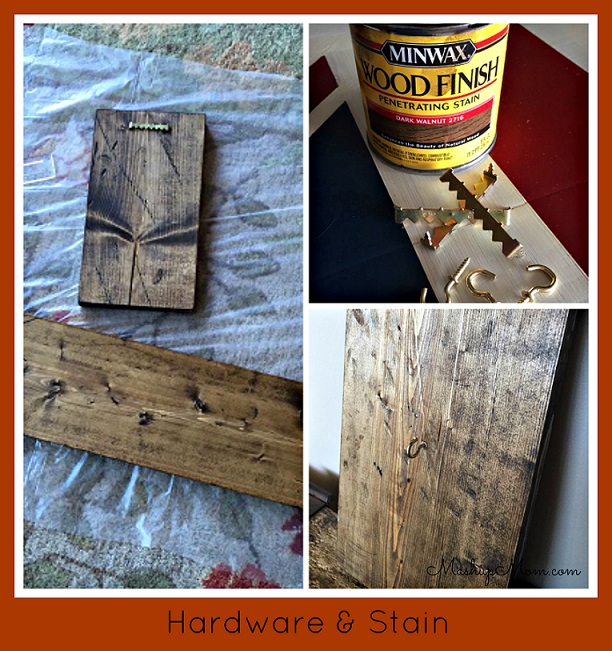
Optional: If you would prefer a more distressed "reclaimed wood" look, you can use a hammer, screwdrivers, a hack saw, chains, rocks, etc. to dent and ding the wood up a bit. I used a hammer, heavy chain, and hand saw to distress my boards.
Step two
Using medium grit sandpaper, sand the edges of each board until smooth.
Step three
Stain or paint the wood the color you want. Be sure to wear rubber gloves, because stain is difficult to remove from skin! Using a rag you're willing to throw away when done, dip a corner of the rag into the stain and rub it on the wood, following the grain. Once your first coat is dry, repeat as many times as it takes to achieve the color you're looking for. I used two coats to achieve the look shown here.
Step four
Once the stain is dry, use a hammer to attach a sawtooth hanger or two to the back of each board. (I used two on the 24" lengths.)
Step five
Depending on the look you're going for, tie a ribbon, twine, wire, or burlap strip around each mason jar under the lip, securing with hot glue. Attach the cup hook to the board at a height that works well with the size of your mason jar, the length of your board, and where you attached the tie around your jar.
Step six
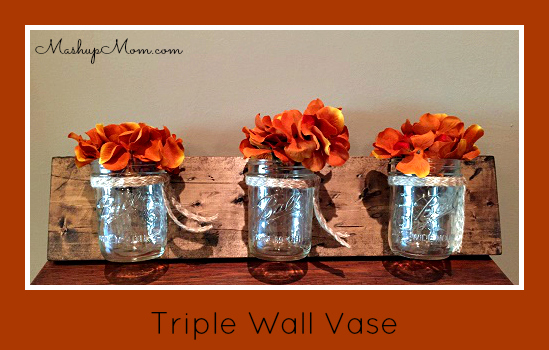
Loop your jar tie over each cup holder, fill the jar with your choice of decor, and hang your finished project on the wall! Note: The jars will be a little wobbly before the board on the wall. Once hung and filled, though, the weight of the filler will help to keep them in place. It's easy to swap out your jar fillers seasonally or when you want fresh look.
Since your jars are not permanently attached to the wood, you can also easily remove them to clean when necessary. You can also embellish the wood if you like; I added a little fabric flower to the board behind my single vase. Other options include a bow, buttons, Scrabble tiles, an initial, and more.