Welcome to Frugal Homemade! This week, I am featuring my DIY Yoga Bolster (which is closely related to my DIY Lumbar Roll). It has been my intention for a while to practice yoga at home more often. Schedules sometimes make it hard to get to the studio as often as I would like, and the more yoga I do, the better I feel. The latter is especially true for restorative poses like supta baddha konasana (reclining bound angle pose). Ideally, for this I would have a blanket, blocks, a strap, and a bolster, most of which I have collected fairly inexpensively over the years. All except the bolster, which, as it turns out, is surprisingly expensive. But they all seemed so simple that I convinced myself I could make my own. I am so happy with how it turned out, I just had to share. And it only required minimal sewing!
My first task was to find something approaching the correct shape, or at a minimum, having the necessary length. This was somewhat challenging because it needs to reach from the top of my head to my lower back. I do realize that one could be made from whole cloth but I do not own a sewing machine and I sew by hand only as is necessary to fix things or for tiny projects. So I was hoping to only have to sew one small end of this thing. Fortuitously, I had a big trash bag full of clothing on its way to be donated, so I dug through that and finally found a pair of (way too) wide leg yoga pants. They were actually really nice quality pants but they fit me awkwardly so I finally decided to let them go, or so I thought. These things were extremely stretchy but still thick enough to hold in the stuffing.
I cut a leg off at about the crotch, which gave me the length I needed plus some extra that would be lost in depth.

I turned it inside out and closed the cut end with a simple whip stitch.
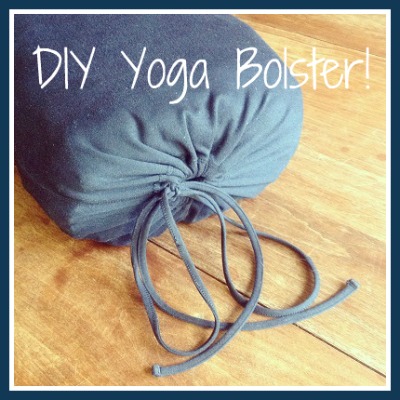
Then I snipped a little hole on the inside of the hem and threaded the drawstring (formerly at the waist of the same pants) through the hole so that end could be closed after stuffing.

I stuffed it with a bunch of the other items from my donate bag, everything from t-shirts to pajama pants to socks. You could use towels, blankets, sheets, or any other cloth items you find. I piled everything neatly in the shape I wanted, checking as I went that it felt even in thickness and on the edges. I laid back on it from time to time. When the pile of clothes gave me the support I was looking for and felt even, I carefully stretched the pant leg bag around the pile of garments.
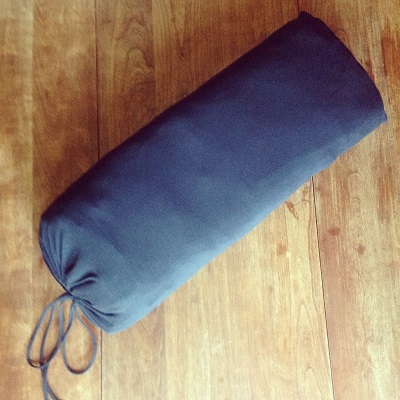
Then I just cinched the drawstring - DONE! The finished product is about 24" long, 10" wide, and 3 ½" thick.
With bit of work on a Saturday morning, I saved myself at least $40. I also love that this stuff that would most likely end up in the trash has a new purpose and isn't going to waste.
![]()
![]()
Be sure to check back each week for something new! I will be bringing you how-tos, advice, and articles on everything pertaining to easy frugal living: From DIY, to recipes, to practical tips and tricks. To help balance out the couponing and deal chasing we do a lot of here, I’ll talk about easy ways to incorporate frugality into everyday life and to do more from scratch.
Corina
Monday 15th of January 2024
Wow! I really appreciate the simplicity and waste reduction of this idea. I had been wanting to try a bolster but felt really hesitant to spend $40 on something I didn't even know if I'd use much (partially fueled by my frequent bag of "need to donate because I never ended up needing" items). This took care of both aspects!
Glad I came across your site, I can't wait to see what else I'll find here!
Connie
Thursday 27th of October 2022
Easy, cost saving and genius use of what most of us have on hand.
jane
Thursday 10th of June 2021
I love this so much!!
Helga
Monday 31st of May 2021
Amazing 🤩 brilliant idea 💡
Becky
Thursday 4th of September 2014
Great idea Trish! I think it looks awesome! :)